Monday, October 8, 2012

Pennsylvania Dutch Hex Signs


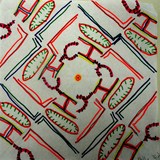
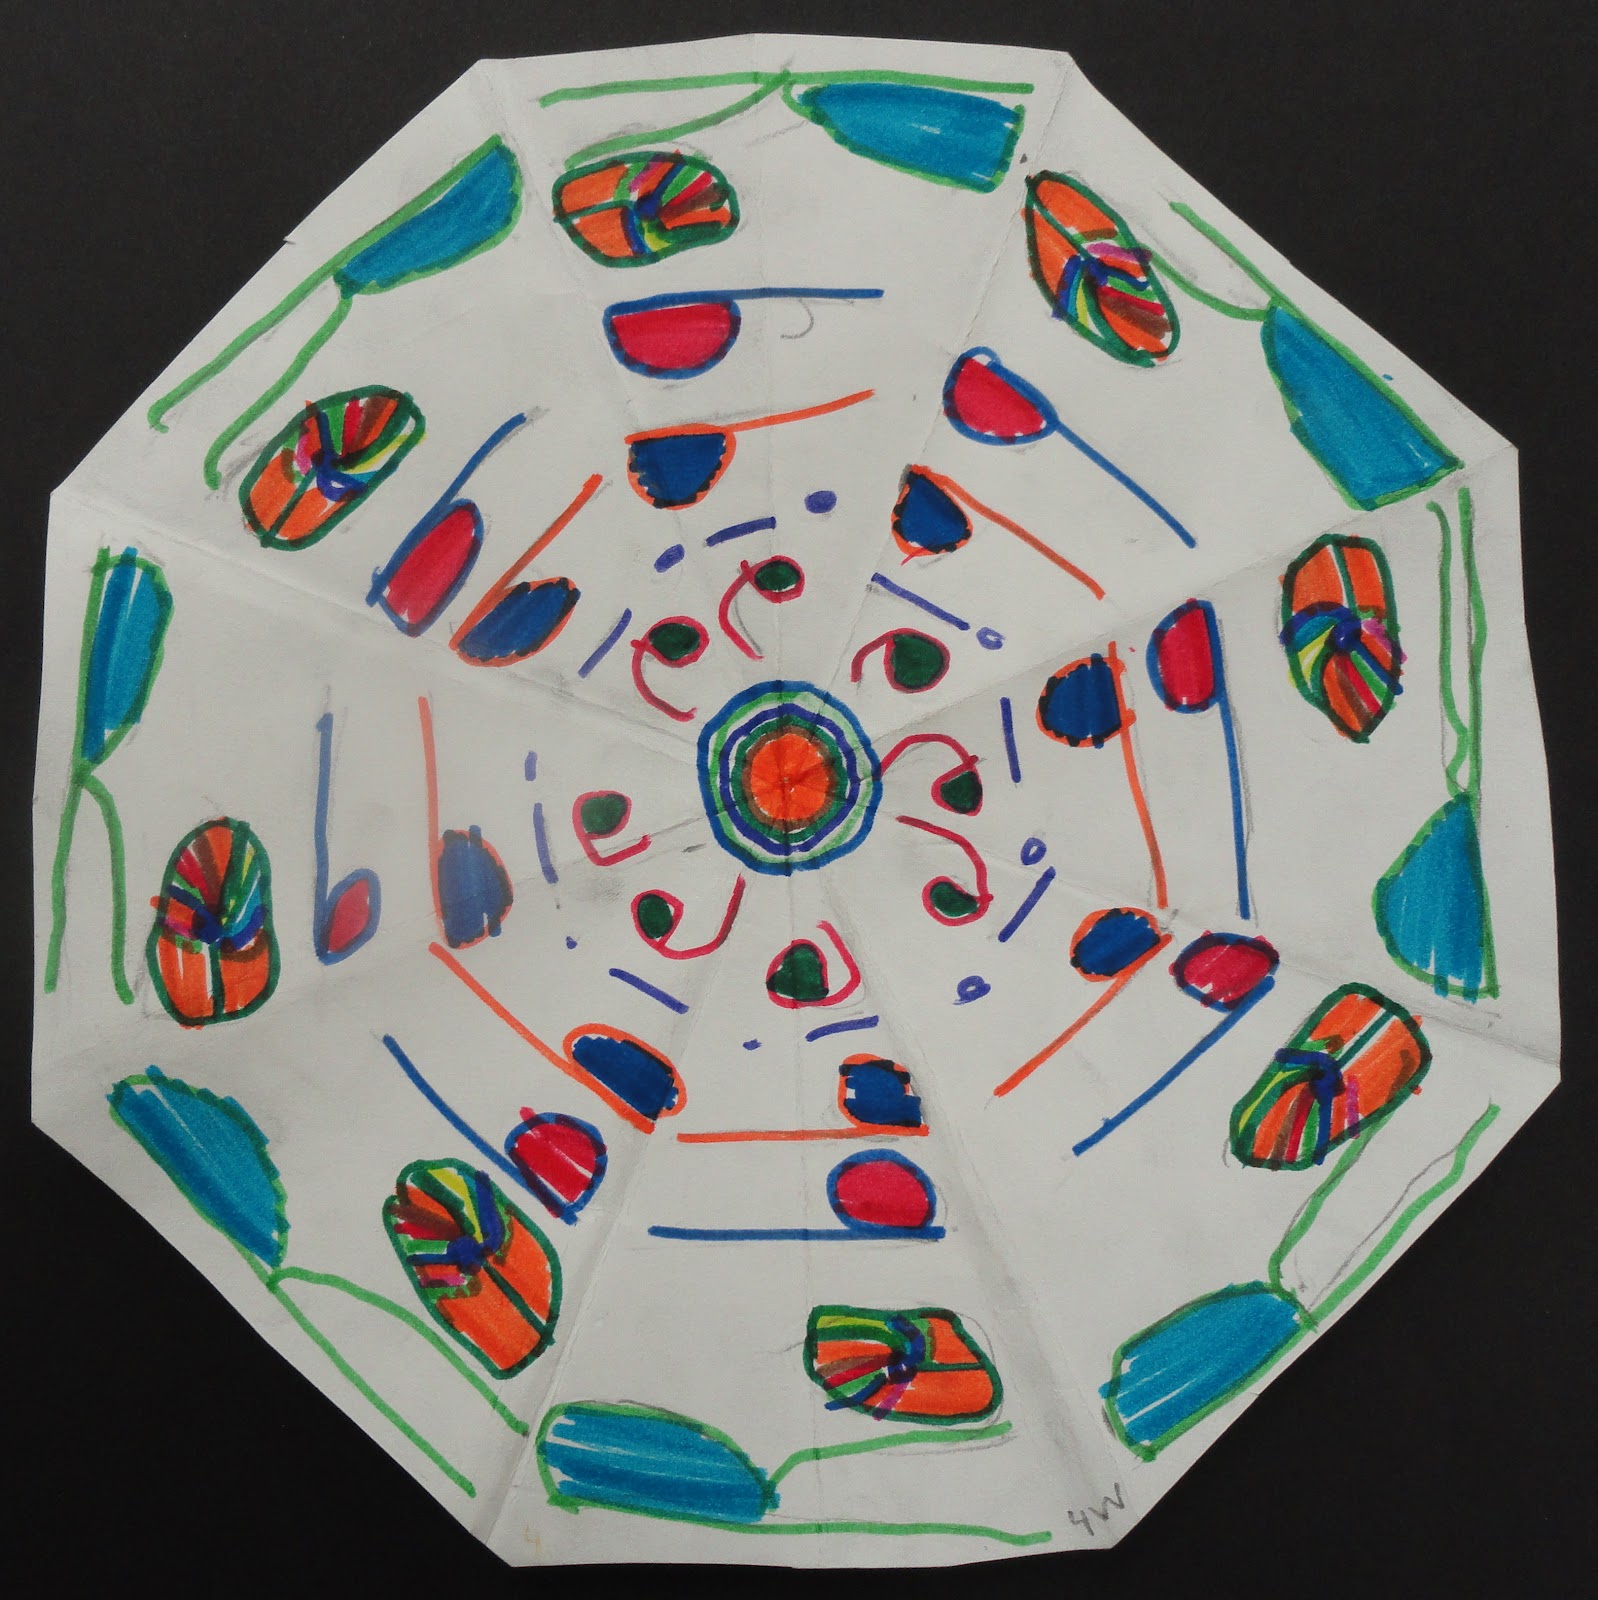
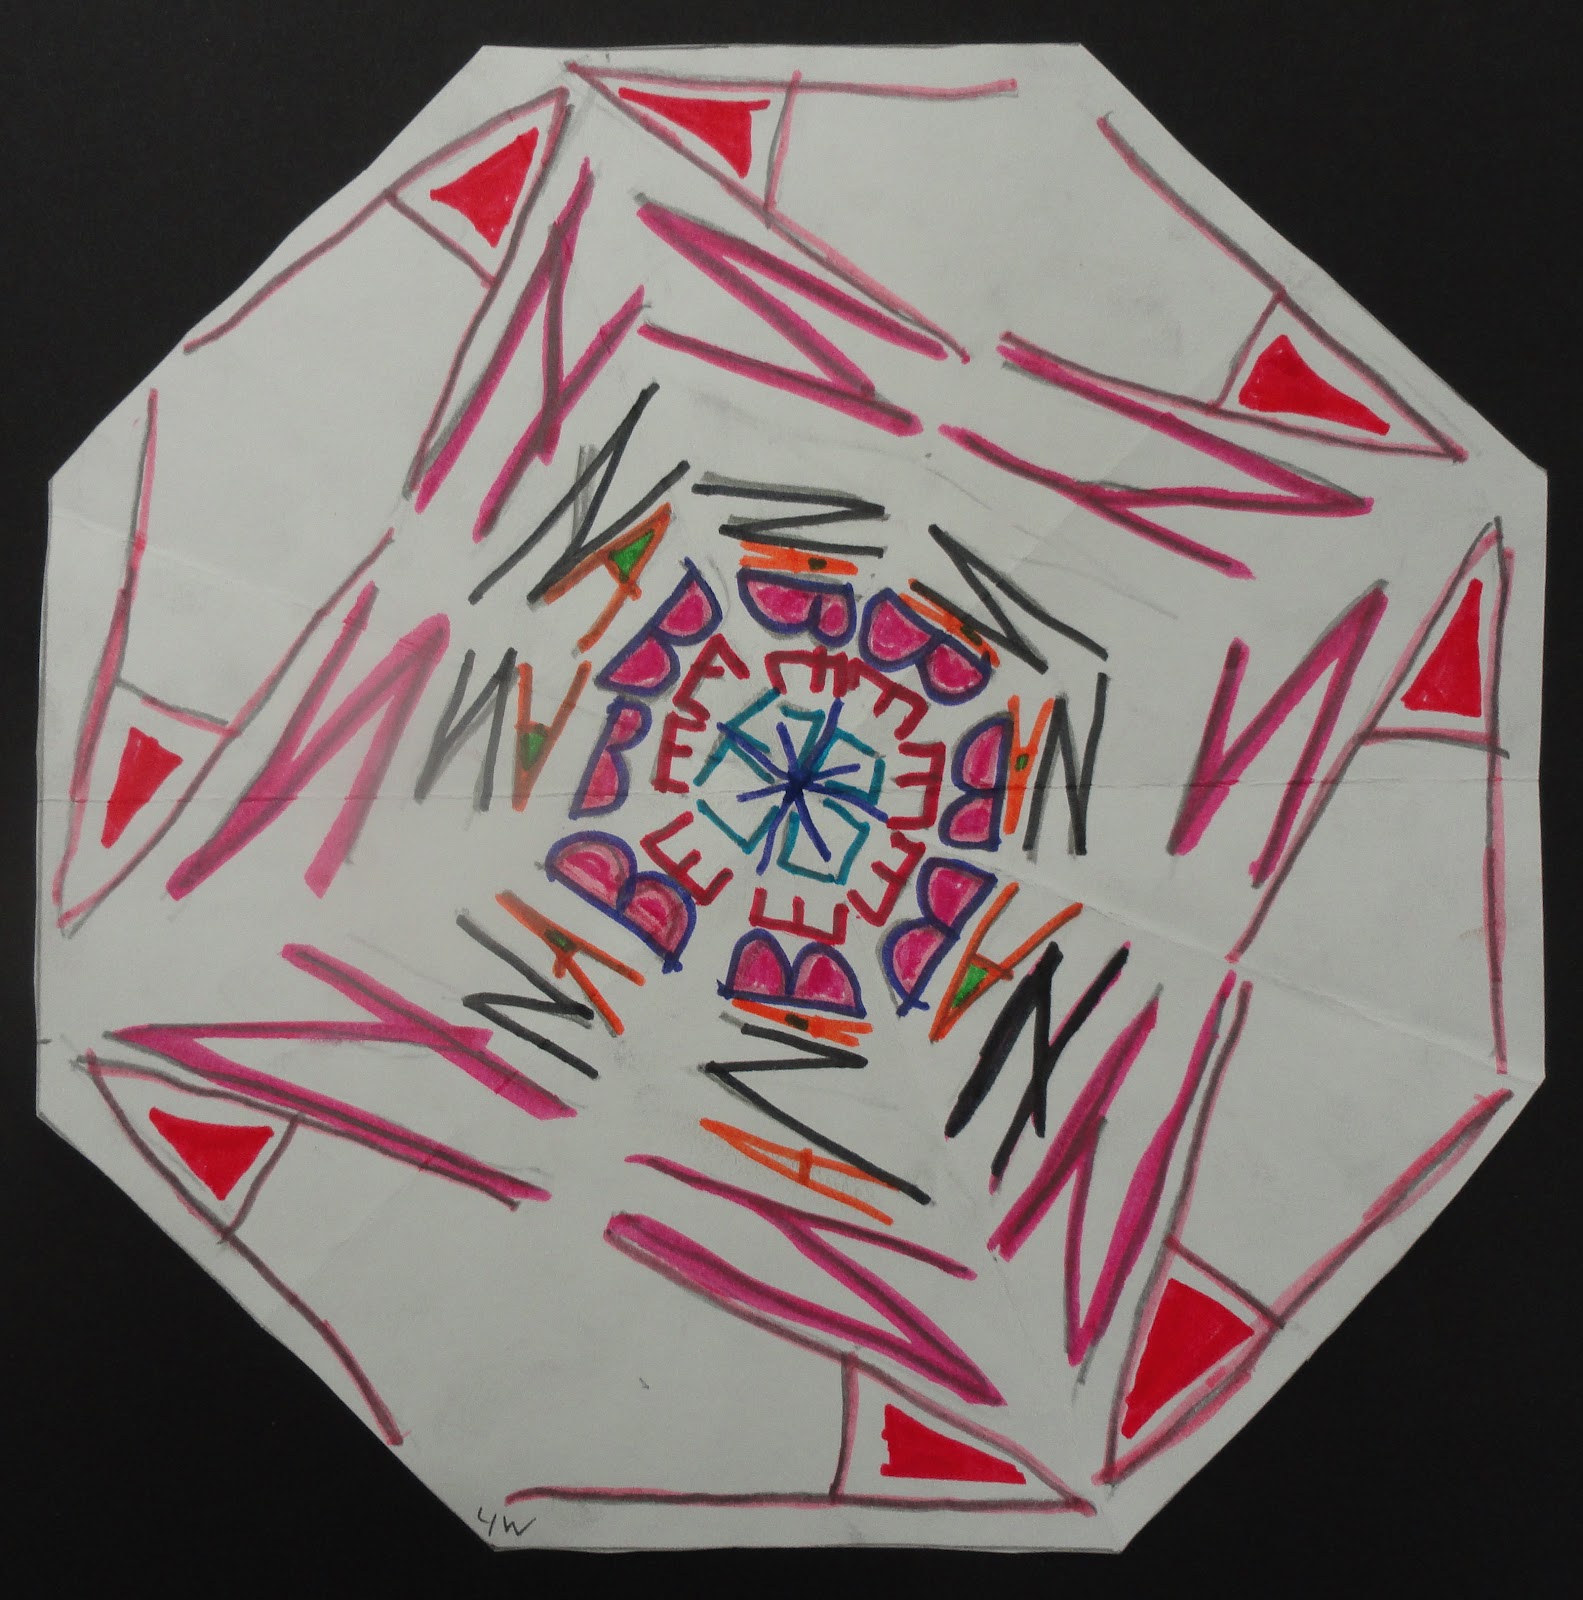
This project was actually done last March. As I was looking through my project photos I realized it was never posted. I think the results for last years Hex Signs are particularly successful. The student artists were directed to create a traditional or modern design for a Hex Sign.


 In fourth grade our students study Pennsylvania. As an introduction to this lesson we talked about the Pennsylvania Dutch and how they made many types of folk art to decorate their surroundings. One form of folk art they made was hex signs. Hex signs are usually designed in a round or radial shape. 
The fourth grade student artists were given handouts on PA Dutch Hex sign designs. We talked about how some of them are symmetrical, some have borders, and others have images of things they were familiar with. We also talked about how the PA Dutch painted their hex signs with bright colors. Certain colors were also considered symbolic.


Sunday, October 7, 2012

SYMMETRICAL PROJECTS - 4TH


We tried  a variety of symmetrical design projects in fourth grade this year.  Some of the classes continued the symmetrical name project we did in previous years. It is still a good lesson on symmetry, transferring, adding their own creative details, and just FUN!

 The project above was created by James.

 This is Grace's symmetrical name design.

 Will created this project.

Kyle did an awesome job on his piece.

Robbie's craftsmanship is outstanding in his.

Another type of symmetrical design some of the classes
 did was with line without writing their names.

Ethan liked this project so much he made a second
 one at home and brought it to school to display.

Sarah's technique of outlining the shapes with 
marker and filling in with crayon looks very polished.

A third form of symmetry some of our fourth grade artists
worked on was radial symmetry.

Emma decided to fill in many of the areas with color
which is very eye catching.

Holly created a colorful design using detailed patterning. 

The last form of symmetry some of our fourth
 grade artists designed resembled a kaleidoscope.
Nicely done Robbie!

Annabell was able to include the mirror image of her name.

JD has some really cool line work in the center of his.

Saturday, October 6, 2012

Self-Portrait Mixed Media Sculptures - 5th

This one class project was a lot of fun to create as well as view by others! Our 5th grade artists did not hesitate to get started making their pipe cleaner stick figures come to life with expressive faces, detailed clothing and imaginative backgrounds.
We were able to display many of these at our beginning of the year open house. They looked awesome!


Monday, September 17, 2012

FIRST ART CLASS - 4TH

We are all excited to begin a great year of creating art at Sinking Springs Elementary. Our fourth grade artists started out the year by being given their art seats, having a brief discussion on Art Room Rules and practicing "Give me Five". Each student also made a special name tent to set out during art class. While the students were making their name tents I took a picture of each student for the seating chart. Next class we will start our first art lesson.


Wednesday, March 14, 2012

Line, Shape, Pattern, Value Name Project - Fifth Grade


Patterns can make a drawing so interesting and fun to look at! 


Fifth grade artist chose an animal or object to draw in pencil using LINES to create the SHAPES that make up what they chose. They were instructed to fill the SPACE of their paper in an interesting way. 


Next they wrote the letters of their first name inside the shape. They tried to stretch the LINES 


Tuesday, March 13, 2012

CLAY CREATURES


Our awesome student teacher, Miss Flanagan, did these colorful clay creatures with
the fourth grade artists. Everyone loves them! 

Miss Flanagan introduced the lesson with an excellent demonstration on creating a pinch pot and using the opening as the clay creatures mouth. She noted the importance of slipping and scoring every piece they added to their creatures.
Miss Flanagan had water containers at the tables for the artists
 to moisturize the clay when it became dry.
The ideas the student artists came up with were so creative!
When they were grouped together they were rather creepy, in a good way.
Each creature was unique. The excitement of their creations motivated the
students to write about their creatures. They included their creatures name, where they 
came from, what they are, and much more.

Congratulations Miss Flanagan on an outstanding art lesson!
I plan on continuing this lesson with my students next year.


Thursday, February 9, 2012

OP ART by Fourth Grade Artists

Op Art is one of our fourth graders favorite  projects. The artists continue creating many more optical illusions on their own after this lesson is taught. Each year I like to change the lesson a little. 

The first class of the lesson we talked about what Op Art is and how it began. During this discussion we view Op Art by Bridget Riley and Victor Vasarely. We then view sections of the DVD by Peggy Flores on Optical Illusions. If time during the first 40 minute class, the student artists explore what they have learned with paper, pencils, and markers.
The second class of the lesson we all began by putting a dot in the middle of our paper. Next we drew  an even number of straight or curvy lines to the outside edge of the paper. The third step was to draw shapes around the dot. They could be organic or geometric. Next we colored the shapes we created in with marker making sure we colored in a checker board effect.

If there was time the students added the final step of making Op Art spheres and arranging on their backround. 


Thursday, January 19, 2012

Native American Totem Stones and Pouches

Our fifth grade artists have become excellent at stitching. They learned the blanket stitch to construct these finely crafted pouches. Each student chose a color of felt and a contrasting color of warp string to show off their beautiful stitching. 


The first class we talked about fabric arts and I demonstrated the blanket stitch. Many of the students got about half of their pouch stitched. The following class they finished their pouches added a bead for a button and made a stone out of indian red clay.


Some of the students chose to keep their clay stone smooth so they could draw on it or paint it after it was fired in the kiln. Others chose to carve their totem in the moist clay. Others chose to make their clay the shape of the totem they chose.


I am always very pleased with the quality of their stitching. Many of the boys are some of our best stitchers. This is the first experience most of our students have stitching. I feel that this a very special first that I have the opportunity to share with them.


Each stone and pouch has a special quality of it's own. The students really enjoy this project.


I would like to thank Tresa a retired colleague of mine for sharing this project as well of many others with me.